
Warning: Undefined array key 2 in /home/syotaro/for-men.jp/public_html/wp-content/themes/sango-theme-poripu/library/functions/prp_content.php on line 15
Warning: Undefined array key 3 in /home/syotaro/for-men.jp/public_html/wp-content/themes/sango-theme-poripu/library/functions/prp_content.php on line 18
Warning: Undefined array key 4 in /home/syotaro/for-men.jp/public_html/wp-content/themes/sango-theme-poripu/library/functions/prp_content.php on line 21
Warning: Undefined array key 2 in /home/syotaro/for-men.jp/public_html/wp-content/themes/sango-theme-poripu/library/functions/prp_content.php on line 27
Warning: Undefined array key 3 in /home/syotaro/for-men.jp/public_html/wp-content/themes/sango-theme-poripu/library/functions/prp_content.php on line 30
Warning: Undefined array key 4 in /home/syotaro/for-men.jp/public_html/wp-content/themes/sango-theme-poripu/library/functions/prp_content.php on line 33
Warning: Undefined variable $return in /home/syotaro/for-men.jp/public_html/wp-content/plugins/kojika-balloon-creator/library/kjk_balloon_sc.php on line 91
Warning: Undefined variable $return in /home/syotaro/for-men.jp/public_html/wp-content/plugins/kojika-balloon-creator/library/kjk_balloon_sc.php on line 91
Warning: Undefined variable $return in /home/syotaro/for-men.jp/public_html/wp-content/plugins/kojika-balloon-creator/library/kjk_balloon_sc.php on line 91
Warning: Undefined variable $return in /home/syotaro/for-men.jp/public_html/wp-content/plugins/kojika-balloon-creator/library/kjk_balloon_sc.php on line 91
Warning: Undefined variable $return in /home/syotaro/for-men.jp/public_html/wp-content/plugins/kojika-balloon-creator/library/kjk_balloon_sc.php on line 91
Warning: Undefined variable $return in /home/syotaro/for-men.jp/public_html/wp-content/plugins/kojika-balloon-creator/library/kjk_balloon_sc.php on line 91
Warning: Undefined variable $return in /home/syotaro/for-men.jp/public_html/wp-content/plugins/kojika-balloon-creator/library/kjk_balloon_sc.php on line 91
Warning: Undefined variable $return in /home/syotaro/for-men.jp/public_html/wp-content/plugins/kojika-balloon-creator/library/kjk_balloon_sc.php on line 91
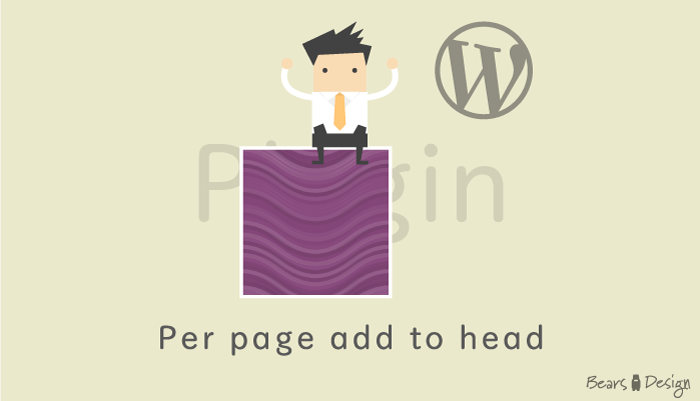
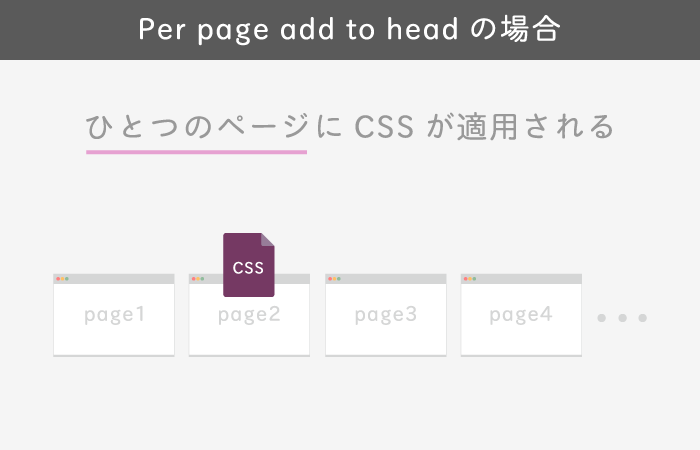
この記事では、ベージごとにCSS(<head>タグ)を追加できるプラグイン「Per page add to head」を紹介します。
追加CSSに記入したカスタマイズコードはすべてのページに適用されます。

一方、投稿画面にあるPer page add to headにカスタマイズコードを記入した場合は、その投稿ページだけにカスタマイズが適用されます。
つまり
その投稿ページだけカスタマイズできるプラグインです。

固定ページや特定の投稿ページのデザインだけ変更したかったり、何かを非表示にしたかったりする時にものすごく役に立つプラグインです。
- 特定のページだけデザインを変更したい
- 特定のページだけアドセンスを非表示にしたい
- style.cssをすっきりさせたい
ちなみに、このプラグインにCSSコードを記入した後は、キャッシュ削除しなくても普通に更新するだけでカスタマイズが適用されます。
プラグインのインストール
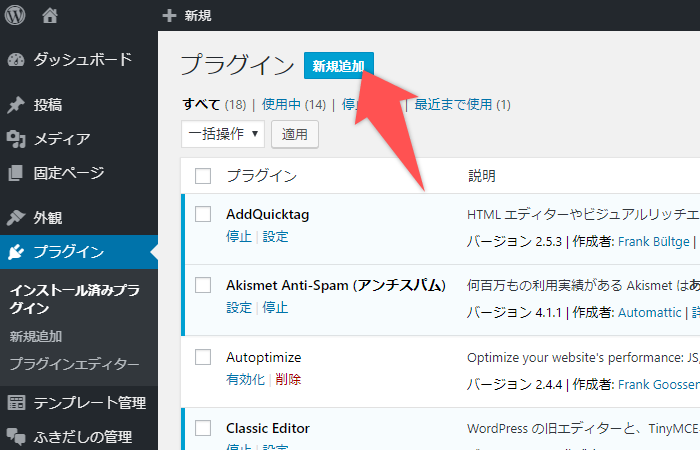
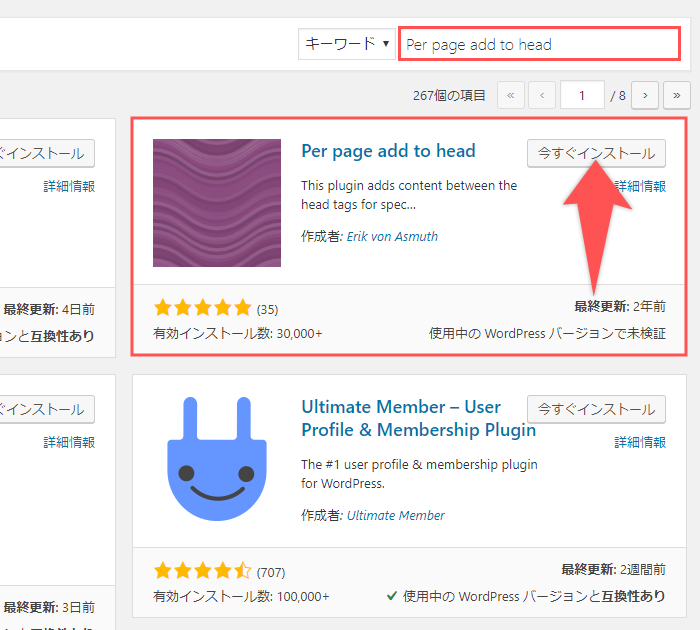
検索欄に「Per page add to head」と記入して出てきたら「今すぐインストール」をクリック。
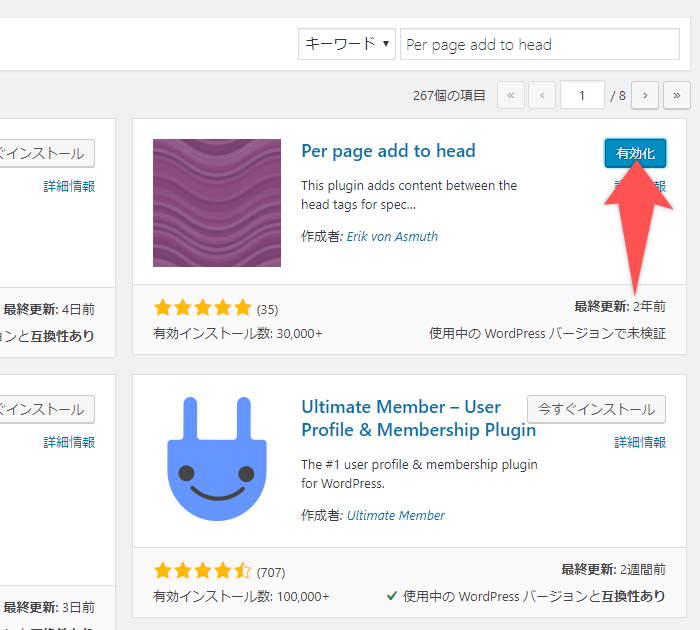
これでインストールは完了です。
細かい設定は一切必要ありませんw

使ってみる
Per page add to headをインストールすると投稿画面(もしくは固定ページ画面)にBOXが出てきます。
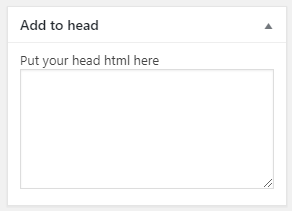
1点だけ追加CSSとはコードの書き方が違い、カスタマイズコードを<style>~</style>で囲む必要があります。
実際にコードを記入
記入したコードはこちら
<style>
.entry-content h2 {
    color: #ff6e6e;
    background: #ffeeee;
    border-bottom: solid 3px #ffc0c0;
    border-left: solid 5px #ff6e6e;
}
</style>
このコードは見出しの色を変更するコードになります。
▽ 動かすことができますよ ▽
[twenty20 img1=”6145″ img2=”6144″ offset=”0.5″]この画像の様に見出しの色を変えることができました。
めちゃくちゃ簡単ですね。
そしてこの方法でCSSコードを追加すると通常必要な「キャッシュを削除して更新」する必要がありません。
トップページで使ってみる
固定ページをトップページに設定した場合、デザイン変更とかいろいろしたいですよね。
そんなときは「Per page add to head」がマジで役に立ちます。
ぼくのサイトでもトップページ用に作った固定ページでは、このプラグインをガンガン使用しています。
 toppopo
toppo
toppopo
toppo

特定のページだけアドセンスを非表示
アドセンスを非表示にしたいページの「Add to headボックス」に以下のコードを追加します。
<style>
.sponsored {
    display: none;
}
</style>
このdisplay: none;はめちゃくちゃよく使うので、おすすめです。
ほかにもbackground: transparent;は透明になるので使い勝手がいいですよ。
Twitterカードの設定
Twitterでシェアするときに表示されるアイキャッチ画像を手動で設定することができます。
記入するコードはこちらのサイトに詳しく書いてあります。
参考 【WordPress】OGPとTwitterカードをプラグイン無しで設定する方法サルワカ | サルでも分かる図解説明マガジン
入力するコードは<style>の前に記入しましょう。
このように「Per page add to head」はカスタマイザーにとって無くてはならないプラグインです。